Forms provide extensive customization options, allowing you to collect donations, sell products, manage event registrations, or gather other types of data from your supporters. Here’s a step-by-step guide on how to create and customize your forms effectively.
Tip: You can create an unlimited number of forms. It’s a good practice to create a new form for each campaign or event you run. This allows for easier data segmentation and helps you analyze the performance of each form individually.
Steps to Create a Form
- Create a new form
- Configure settings
- Design the structure of your form
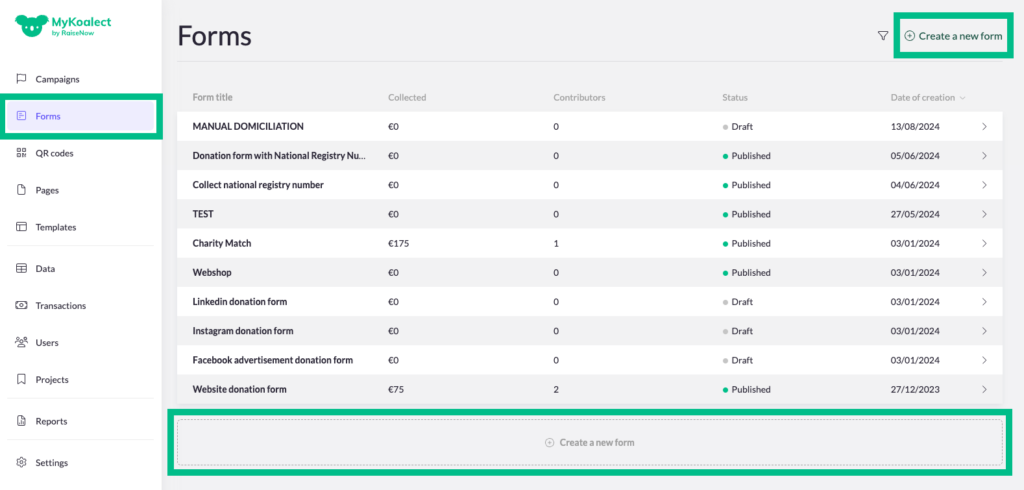
1. Create a new form
- Navigate to the ‘Forms’ section in the navigation column.
- Click on ‘Create a new form.’
- Name your form, then press ‘Create new form.’
Tip: If you frequently create similar forms, use the duplication feature to save time. This allows you to reuse the structure of an existing form without starting from scratch.
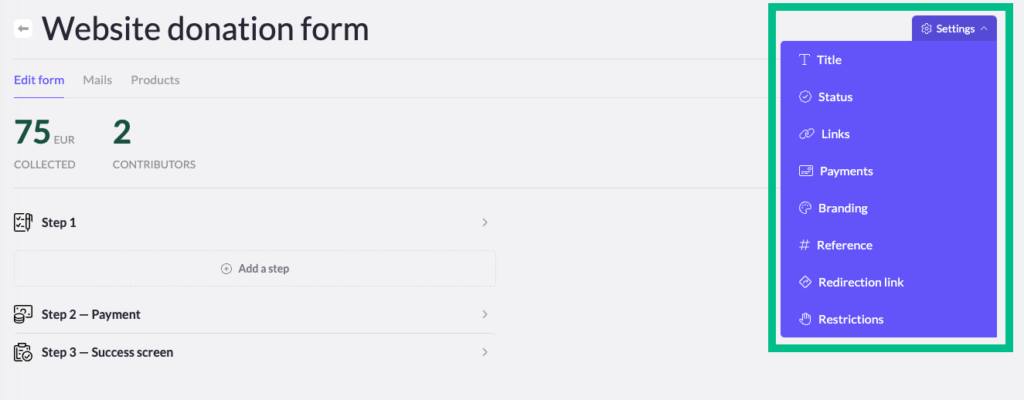
2. Configure settings
After creating a new form, you’ll need to configure several settings to tailor it to your needs. All settings are listed below:
- Title: Change the form’s title here. Note that the form’s URL will automatically update to match the new title.
- Status: Set the form’s status to ‘Published’ when you’re ready to start collecting data, whether it’s donations, registrations, or sales. Until then, keep it in ‘Draft’ mode.
- Links: Find the links for your form, organized by language.
- Payments:
- Form Pricing: Set a minimum payment amount required to submit the form.
- Tax Certificate Availability: Indicate whether payments made through this form are eligible for tax receipts. This information will also appear in your data exports.
- Payment Bank Communication: Customize the text that appears in the donor’s banking information after they’ve made a payment through the form.
- Branding:
- Customize the logo and background for each language version of the form.
- Reference:
- Create a main and secondary reference that will appear in your data exports and API, helping you to precisely track where the data came from.
- Payconiq QR Code (for Koalect SCAN clients Only):
- Add a QR code for payments via Payconiq.
- Redirection Link:
- Set the URL where users will be redirected back, after they complete the form.
- Restrictions:
- Read more about this setting.
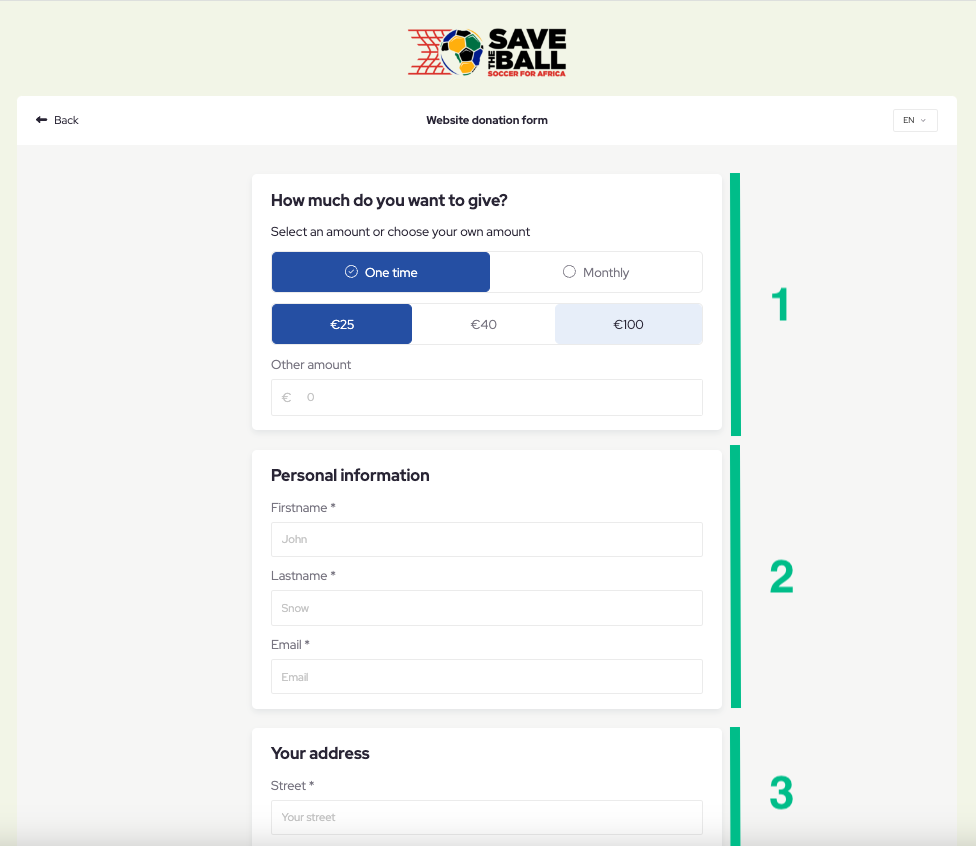
3. Create the Structure of Your Form
Now that the settings of your form are configured, it’s time to design its structure, starting with configuring the steps, then add sections and finally add elements.
Steps:
A form is divided into at least two steps, each representing a different screen that users will navigate through as they complete the form. Step 1 typically involves collecting personal information and processing payment, while Step 2 serves as the confirmation or success screen.

Add sections:
Each step is divided into separate. You can choose from default sections like ‘Users Information,’ ‘Business information’, ‘product selection’, etc., or create custom sections based on your needs.
All elements that are grouped in one section will be grouped in the same white block in the form.
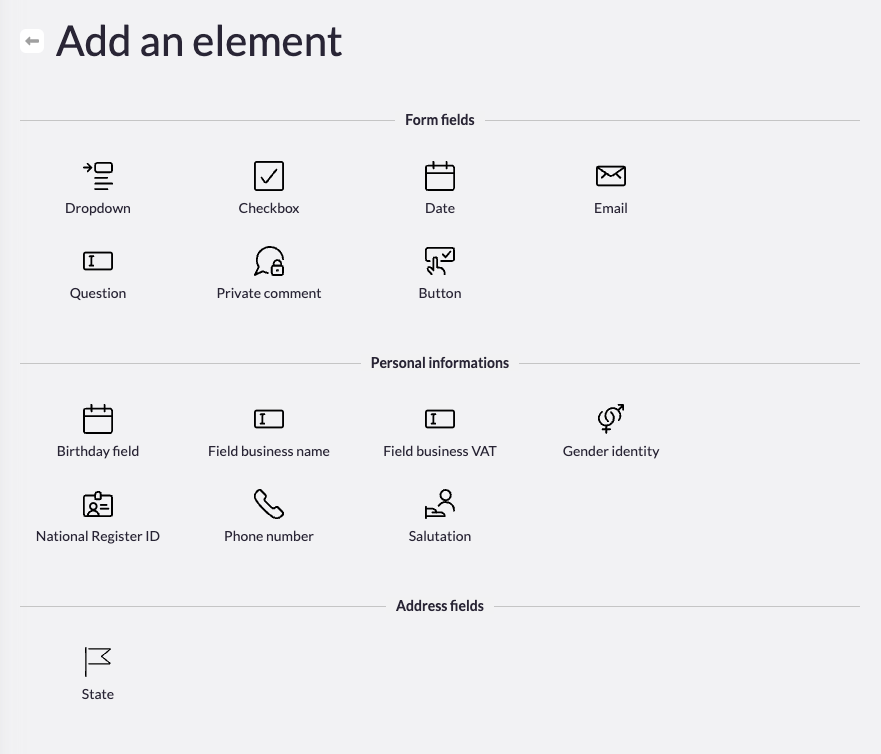
Add elements:
In each section, insert elements such as text fields, products, dropdowns, checkboxes, donation amount choices (TIP: Here’s a link to all elements explained).
Once everything is added, drag and drop the elements and sections into your prefered order.
Change the confirm button copy:
Customize the text on the final confirmation button to better align with your form’s purpose, such as ‘Submit donation’ or ‘Complete registration.’
Conclusion
By following these steps, you’re well on your way to creating highly customized and effective forms.
Tip: Before publishing your form, it’s recommended to run a few test submissions to ensure everything works as expected.