The inclusion of the ‘products’ feature opens possibilities for all sorts of fundraising campaigns onto one single platform, simplifying the process of selling products for both you and your supporters.
Within your forms, you can sell your products such as pancakes, tickets to your (sport-)events, etc. To begin offering products to your users, you have to first create a product, secondly, implement it in your desired ‘Forms’ and finally manage your stock. To do so, follow these instructions:
1. Create a product:
- Go to ‘Forms’ > click on the form you want to add products to > ‘Products’ > ‘Add new product’.
- Enter a ‘Title’ and click on ‘Create and set up new product’.
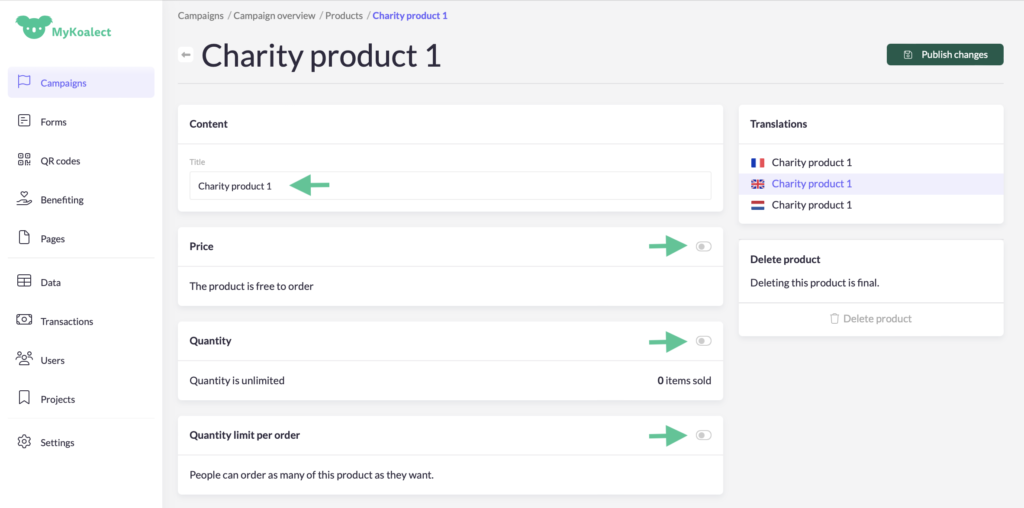
- Set up your product with the following information:
- Add a ‘Title’.
- Choose to keep the product free or put a price on it.
- Establish a specific quantity of products or leave it unlimited.
- Add a limit on the amount of products users can order or allow them to select an unlimited amount.
- Translate your product’s details if necessary.
- Save by clicking ‘Publish changes’.
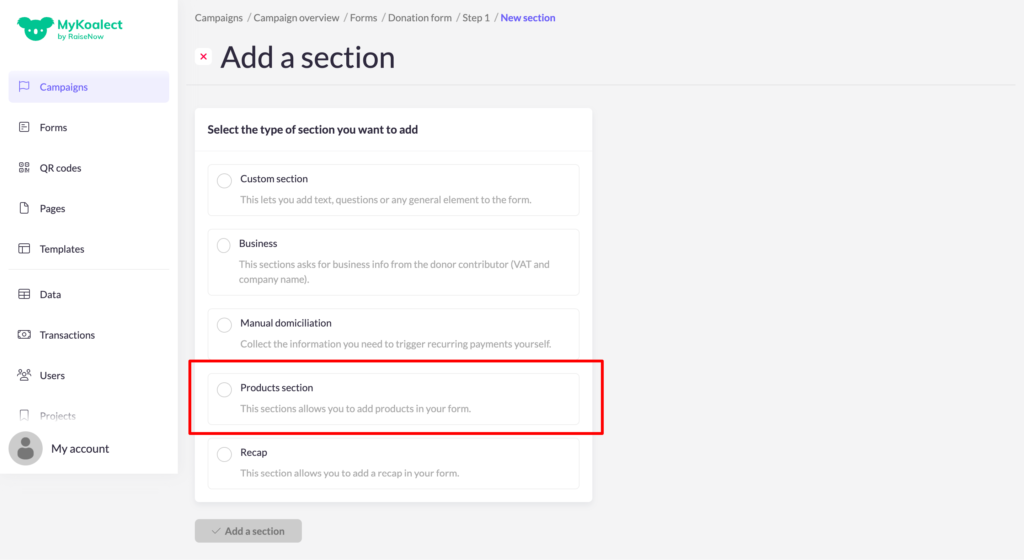
2. Add products in your ‘Forms’:
- Go to ‘Forms’ > click on the form you want to add products to.
- Add a ‘section’ to the form. > Choose ‘Products section’.
- Modify the different elements in the section where necessary.
- Click on ‘Product selection’ and fill out the necessary information:
- Press ‘Save’.
3. Manage your stock and orders:
- Go to ‘Forms’ > click on the form with your products > ‘Products’ > Click on the product you wish to manage.
- Here you can view an overview of your ‘Quantity in stock’ and ‘Quantity ordered’.
- Click on a specific product to modify the ‘Quantity’ of this product in your digital stock if necessary.
- ‘Publish changes’.
