Add organizations or projects that can receive donations through your fundraising campaigns.
To create new beneficiaries, follow these steps:
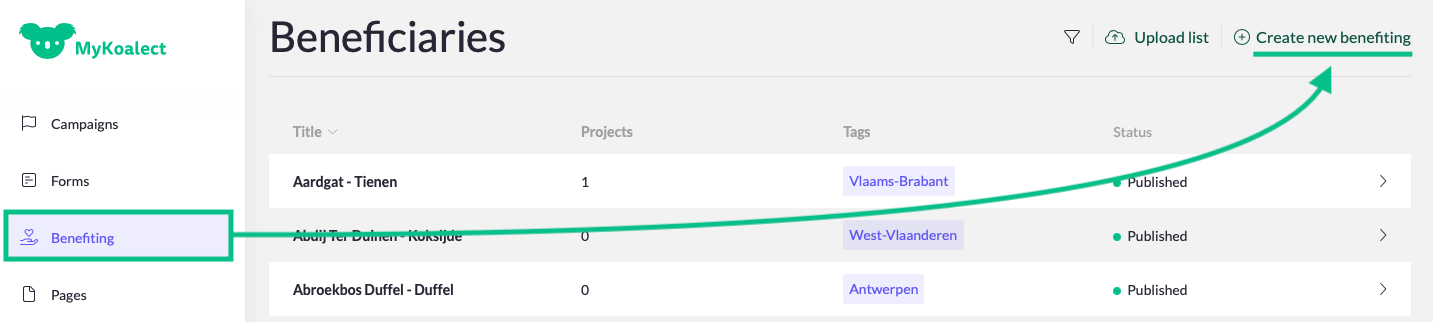
Go to the “Benefiting” tab > “Create new benefiting”.
Fill out the following details.
Title: Choose a title for the beneficiary. (Only this field is mandatory)
Reference: Assign a unique reference code for identification in your data.
Tag: You can assign a 'Tag' to the beneficiary. This way supporters can easily find the beneficiary they are looking for.
Responsible Person's Email: Provide the email of the beneficiary’s contact person, if applicable.
Responsible Person's Name: Provide the name of the beneficiary’s contact person, if applicable.
Press “Create benefiting”.
Uploading many beneficiaries at once?
Easily import your existing list of beneficiaries by following these steps:
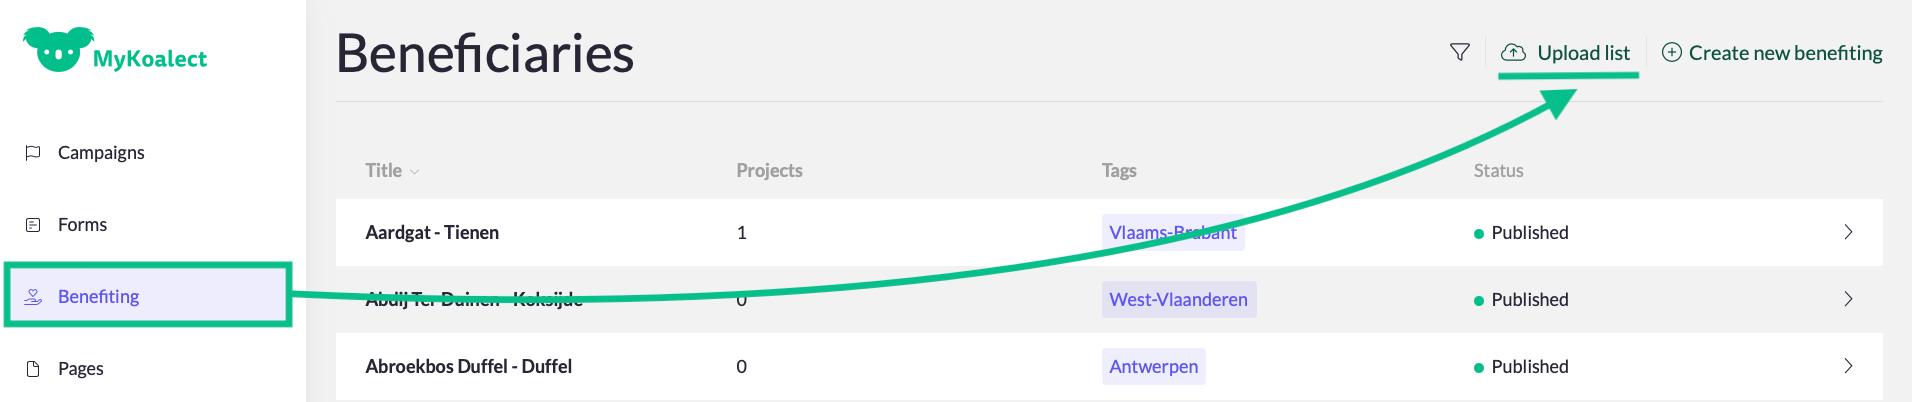
Go to “Benefiting” > “Upload list”.
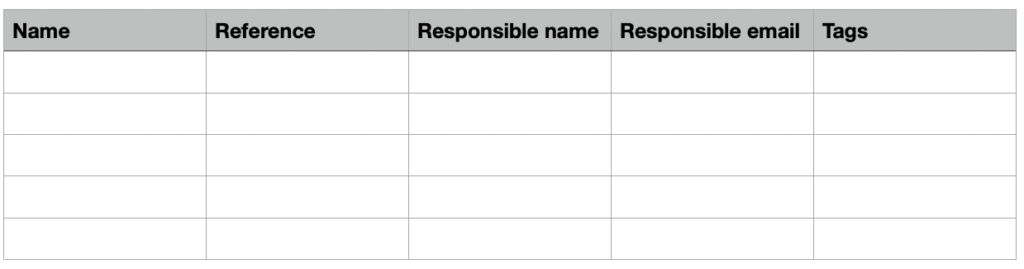
Upload a .csv file with beneficiary information. Download and use this example file to prepare yours. To ensure a successful upload make sure to keep the format of the example file and:
use the same column titles.
leave columns blank when not applicable.
not change the order of the columns.
Example of the correct format for filling in the .csv file.