After creating a new campaign, you can make it visible on your platform, allowing users to engage with it and create new projects. To make campaigns visible/active on your platform, ensure these two elements are correctly set up:
1. The campaign has to be published:
- Go to ‘Campaigns’ > click on the campaign you want to edit > click on ‘Settings’ in the right above corner > click ‘Status’ > make sure the campaign’s current status is set on ‘Published’.

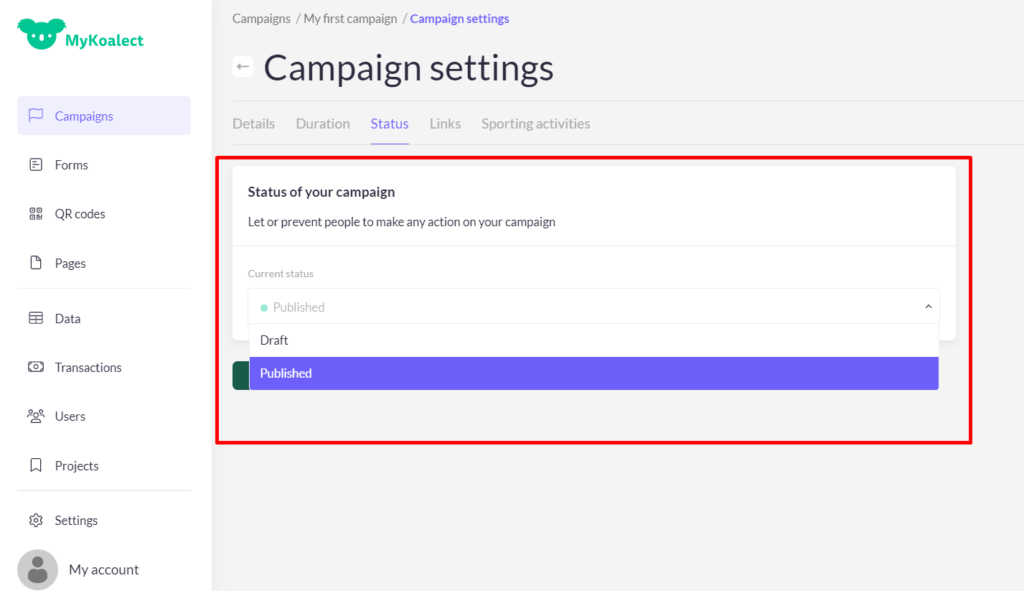
- Click ‘Save’.
2. The ‘Campaign section’ needs to be added on the correct page of your platform:
- Go to ‘Pages’ > click on the page you want to show campaigns on.
- Click on ‘Add section’ and add ‘Campaigns’

- Click on ‘Add campaign’ and select the campaign(s) you want to display.
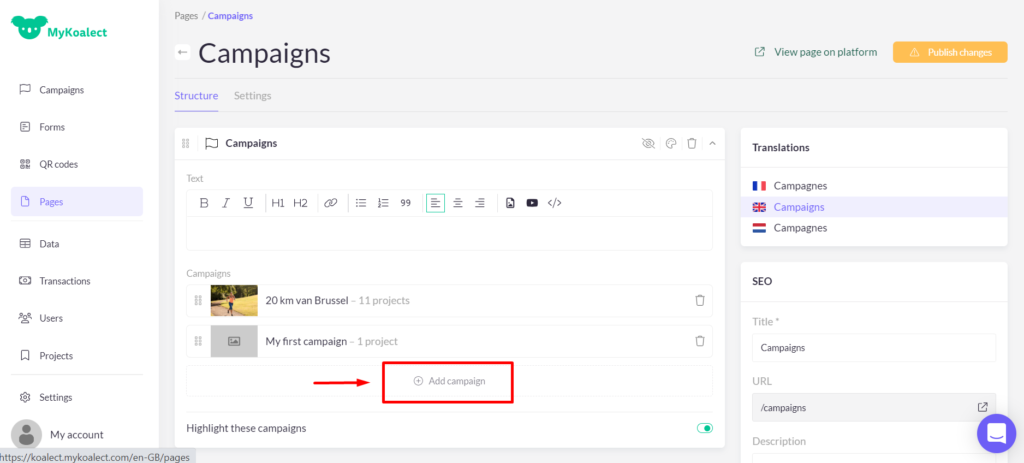
- Click ‘Save’.
There are two visual formats available for displaying campaigns:
Go to ‘Page’ > click on the page you want to show campaigns on > Go to or add the ‘Campaigns’ section toggle ‘Highlight these campaigns’ to display the highlighted version of the campaigns. > Click ‘Save’.
You can switch between these formats if you follow these instructions:
Standard:

A vertical layout that showcases multiple campaigns but provides quite little space for text.
Highlighted:

A horizontal layout that provides more space for text when showcasing your campaigns. It will occupy a larger portion of your screen and multiple campaigns are stacked on each other.
| Tip: You have the option to include multiple “Campaigns” sections on a single page. This allows you to highlight a few selected campaigns while showcasing the remaining ones in a standard manner. |