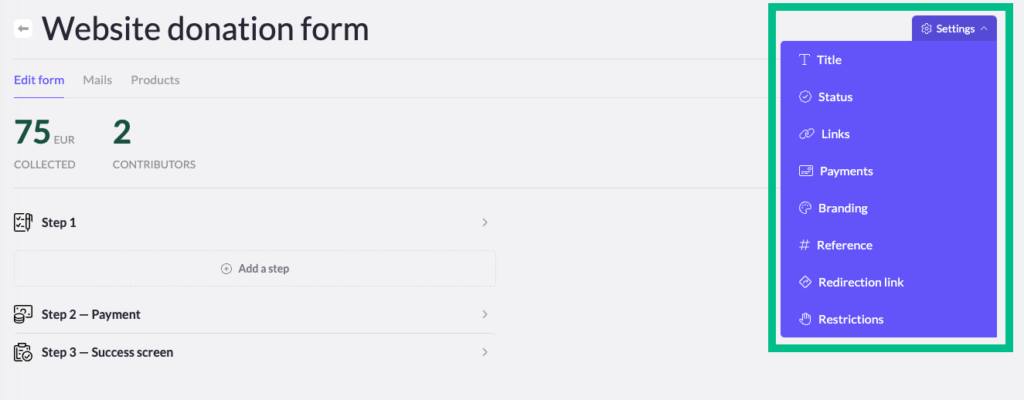
After creating a new form, you’ll need to configure several settings to tailor it to your needs. All settings are listed below:
- Title: Change the form’s title here. Note that the form’s URL will automatically update to match the new title.
- Status: Set the form’s status to ‘Published’ when you’re ready to start collecting data, whether it’s donations, registrations, or sales. Until then, keep it in ‘Draft’ mode.
- Links: Find the links for your form, organized by language. Attention: if the status of your form is set on ‘draft’, the draft links will appear here. If the status of your form is set on ‘published’, the live links will appear here.
- Payments:
- Form Pricing: Set a minimum payment amount required to submit the form.
- Tax Certificate Availability: Indicate whether payments made through this form are eligible for tax receipts. This information will also appear in your data exports.
- Payment Bank Communication: Customize the text that appears in the donor’s banking information after they’ve made a payment through the form.
- Branding:
- Customize the logo and background for each language version of the form.
- Reference:
- Create a reference that will appear in your data exports and API, helping you track which form the data came from.
- Payconiq QR Code (SCAN Only):
- Add a QR code for payments via Payconiq.
- Redirection Link:
- Set the URL where users will be redirected after they complete the form.
- Restrictions:
- Read more about this setting.